
Front seat cover fitting videosUpdated a day ago
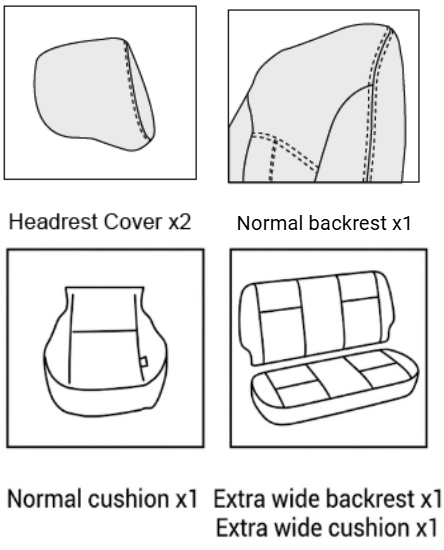
There are three different front seat cover configurations — check your parts list or packing slip to see which one you have before choosing a video:
| If you package contains: | You have: |
|---|---|
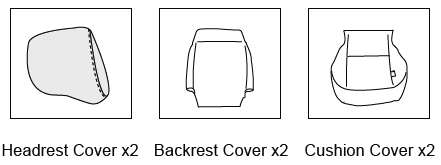 | Two Piece style covers (backrest and cushion are separate) |
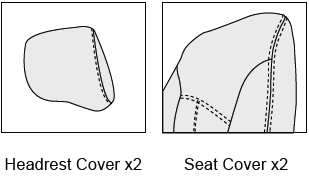 | One Piece (backrest and cushion in one cover; headrest cover fitted separately) |
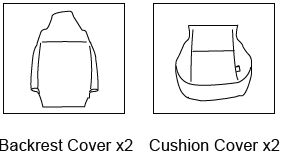 | Integrated Headrest (headrest doesn't come out — it's part of the backrest cover). Please note this can be either one or two piece. |
| Bucket & 3/4 Bench (A full set of headrest, backrest and cushion for the drivers bucket seat, and a full set of headrest, backrest and cushion for the longer passenger bench seat) |
⚠️ Before you fit any front seat cover — airbag tag
WARNING: All Razorback 4x4 seat covers come with a certified Airbag seam that must be placed correctly to ensure the safety of everyone in the vehicle.
Identify the driver and passenger covers by the white label on the inside of each cover. Make sure the driver cover is on the driver backrest and passenger cover is on the passenger backrest.
General tips (all configurations)
- Recline the seat as far forward as possible before feeding the back of the cushion cover between the backrest and base — this is what gives you room to work the cover through the gap (the "h-point").
- Make sure to fit the cushion first - this will make the rest of the fitment process easier.
- Don't pull from the velcro when finessing the cover through a tight gap. Hold the fabric itself securely and work it through — pulling on the velcro can damage or detach it.
- Once the cushion cover is in place, raise the seat to its highest position to give yourself the best access underneath for connecting the velcro straps to their carpet/seat counterparts.
- Neoprene covers: turn inside out and roll down/over the cushion or headrest, following the seams as you go.
- Canvas+ covers: these can be pulled on directly without turning inside out, but are stiffer — if a canvas cover feels tight, warming it in the sun for 10–15 minutes beforehand makes a real difference.
Neoprene Front Seat Cover installation guide (2-piece covers):
Applies to all Neo Daily & Neo Pro seat covers that have separate backrest and cushion parts.
Neo Tourer Front Seat Cover installation guide:
Installation guide for Neo Tourer front seat covers only with detachable headrests.
Canvas+ front seat cover installation guide (2 piece covers):
Applies to all Canvas+ Front Seat Covers with detachable headrests and a separate backrest and cushion parts
Front seat cover installation guide (1 piece covers):
Applies to all seat covers that have only 1 piece - with the backrest and cushion being connected.
Video coming soon: In the mean time please see the fitting instructions here.
Integrated headrest front seat cover installation guide.
Applies to all seat covers with a headrest that cannot be removed.
Video coming soon: In the mean time please see the fitting instructions here.
Bucket and 3/4 bench front seat cover installation guide:
Applies to all seat covers with one standard bucket driver seat & one wider passenger bench seat
Video coming soon: If you need a hand with installation please reach out to our wonderful team!
Still stuck after watching the video?
Check Front Seat Common Fitment Issues & Tips next. If that doesn't resolve it, contact us with your order number, vehicle details, and photos.